
A Complete Guide to Homemade Soap: Safe and Simple Recipes
Explore a complete guide to making homemade soap safely and effectively with precise recipes and essential tips.
TL;DR
If you're looking for a reliable homemade soap recipe with precise measurements and no dangerous improvisation, here’s the essential information:
- Cold saponification is the simplest method to start: oils + lye + water, mixed at room temperature.
- Allow 24 to 48 hours of resting before unmolding, followed by a 4 to 8-week curing period before use.
- Lye is caustic: wear gloves, goggles, work in a ventilated area, and always add lye to water, never the reverse.
- Two easy recipes to begin with: honey-oat soap (for sensitive skin) and clay exfoliating soap (for oily skin).
Step-by-Step Guide to Making Your Own Natural Soap
Tired of long ingredient lists on commercial soaps? Want to know exactly what touches your skin without sulfates or questionable preservatives? Creating your own homemade soap recipe gives you complete control over the ingredients, and it’s more accessible than you might think.
This article provides a complete homemade soap recipe with measurements to ensure your first attempt is successful and safe.
Necessary Equipment Before You Start
Nothing exotic, but no improvisation either.
For a successful homemade soap recipe, you will need:
- A precision scale (accurate to the gram, essential for lye)
- Containers made of stainless steel, glass, or resistant plastic (never aluminum or zinc, as lye attacks them)
- A dedicated immersion blender for soap making (do not reuse for cooking)
- A kitchen thermometer
- Thick gloves, safety goggles, and an old long-sleeved shirt
- A mold (silicone, lined cardboard, or a simple ice cube tray for testing)
- Caustic soda (99% NaOH), purchased from a hardware store or specialty shop
- Demineralized water
- Your choice of vegetable oils (coconut, olive, sunflower, etc.)
Always work in a well-ventilated area, away from children and pets, with running water nearby.
The Cold Saponification Method, Step by Step
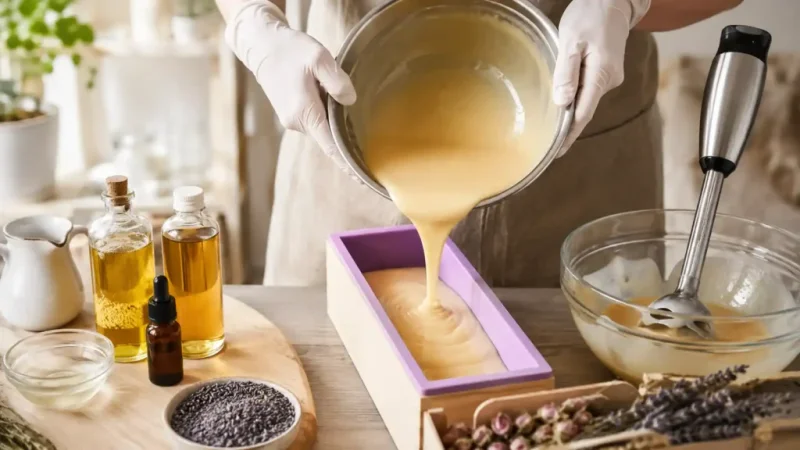
Cold saponification transforms a mixture of oils and lye into soap without heating. This is the go-to technique for artisanal homemade soap recipes.
Step 1: Safety First
Put on gloves and goggles before even handling the lye. Ensure the area is well-ventilated. This should become an automatic reflex for every session.
Step 2: Prepare the Lye Solution
For 550 g of oils, use:
- 108 g of caustic soda (NaOH)
- 320 g of demineralized water (water/lye ratio of about 3 to 1)
Always add lye to water, never the other way around—otherwise, the reaction can be too violent and cause splashes. Stir gently until completely dissolved. The mixture will heat up significantly and release fumes: avoid breathing directly above it. Allow it to cool to between 29 °C and 45 °C in a basin of cold water.
Step 3: Prepare the Oils
Melt solid oils (coconut, shea) in a double boiler at around 60 °C, then add the liquid oils off the heat. Let it cool until it reaches the same temperature range as your lye solution, ideally 35-40 °C for both.
Step 4: Mix Until Trace
Pour the lye solution into the oils (not the reverse) and blend in short bursts with the immersion blender. You are looking for the “trace”: a light pudding-like texture where the mixture leaves a visible mark on the surface when poured. This indicates that saponification is starting.
Step 5: Pour, Unmold, and Cut
At trace, add honey, clay, or essential oils if your recipe calls for it, then pour into the mold. Cover with plastic wrap or a cloth and let it rest for 24 to 48 hours in a safe place. Unmold and cut into bars.
Step 6: Curing
Lay your soaps flat, spaced apart, in a dry, airy place, out of direct sunlight, for 4 to 8 weeks. During this phase, the pH decreases, and the soap becomes gentle on the skin.
Basic Recipe: Honey-Oat Soap for Sensitive Skin
This homemade soap recipe is gentle and suitable for reactive skin due to the superfat and soothing oat flakes.
Ingredients (for about 700 g of soap):
- 250 g coconut oil
- 200 g high oleic sunflower oil
- 100 g olive oil
- 108 g caustic soda
- 320 g demineralized water
- 1 tablespoon of honey (added at trace)
- 2 tablespoons of finely ground oat flakes (added at trace)
Add the honey diluted in a little warm water to prevent overheating the mixture. Pour into the mold, let rest for 48 hours, then start the curing process for a minimum of 5 weeks.
Exfoliating Clay Soap Recipe for Oily or Combination Skin
A variant of the homemade soap recipe designed to gently unclog pores without irritation.
Ingredients:
- 250 g coconut oil
- 150 g sunflower oil
- 150 g castor oil (for lather)
- 108 g caustic soda
- 320 g demineralized water
- 2 teaspoons of green or pink clay (diluted in a bit of water, added at trace)
Green clay is more detoxifying, while pink clay is gentler if your skin is combination without excess oil. Curing time recommended: 6 weeks for a firm soap.
Summary Table of Recipes
| Recipe | Key Ingredients | Lye/Oils Ratio | Curing Time | Skin Type | |-----------------------------|--------------------------------------|------------------------------|----------------------|--------------------------| | Basic Soap (coconut-sunflower-olive) | Coconut 250g, sunflower 200g, olive 100g | 108g NaOH for 550g oils | 4 to 8 weeks | All skin types | | Honey-Oat Soap | + honey, oat flakes | 108g NaOH / 550g oils | Minimum 5 weeks | Sensitive skin | | Exfoliating Clay Soap | Coconut, sunflower, castor + clay | 108g NaOH / 550g oils | 6 weeks | Oily, combination skin |
Caustic soda is corrosive: it can burn skin and cause severe eye damage if splashed. Here are some non-negotiable safety rules:
- Thick gloves, protective goggles, long sleeves, closed-toe shoes.
- Always add lye to water, never the reverse.
- Work in a well-ventilated area, away from children and pets.
- In case of contact with skin or eyes: rinse thoroughly with clear water and consult a doctor if needed.
- Clearly label your containers and store lye out of reach.
Note: Freshly unmolded soap remains slightly caustic until saponification is complete. Handle it with the same precautions until the end of the curing process.
Alongside your cold saponified soaps, black soap remains a reliable option for body and home cleaning—handy to keep on hand while your homemade soaps finish curing.
Common Beginner Mistakes to Avoid
These mistakes often occur when discovering the homemade soap recipe:
- Using an approximate lye calculator or none at all. Each oil has a different saponification index: never measure “by eye.”
- Reusing kitchen equipment for food afterward: the blender and containers should remain dedicated to soap making.
- Unmolding too early out of impatience: this weakens the soap and delays curing.
- Misusing homemade soap for degreasing without consideration: cold saponified soap is not formulated for cleaning greasy surfaces. For your natural cleaning routine, it’s better to use a powerful natural degreaser designed for that.
- Neglecting ventilation during lye preparation.
- Skipping the trace step and pouring too early: the mixture will separate in the mold.
Curing Time: Why Patience is Key
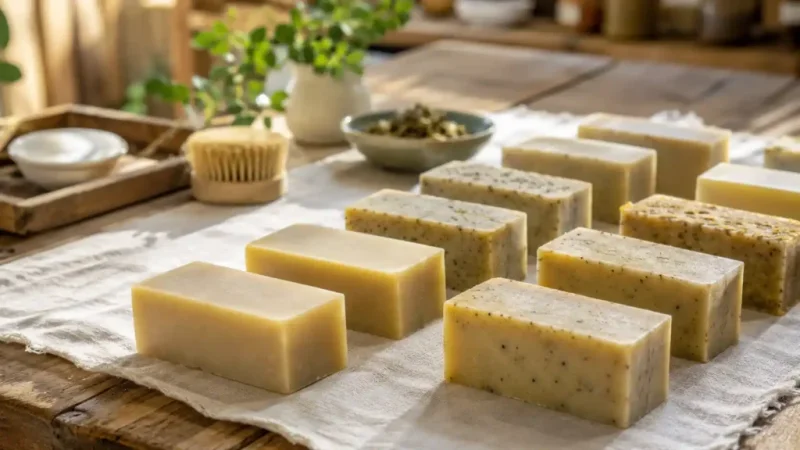
The curing process is not just a formality. During these 4 to 8 weeks, water evaporates, and the soap's pH gradually decreases, transitioning from an irritating mixture to a gentle and durable soap. Using soap too early will result in a softer, less lathering product that may irritate the skin.
Store your bars on a rack or clean cloth, flat, spaced a few centimeters apart, in a dry room at room temperature. Turn them once a week for even drying.
Frequently Asked Questions
How long does it take to make homemade soap? Preparation takes 1 to 2 hours. Then, allow 24-48 hours before unmolding, followed by 4 to 8 weeks of curing before use.
Can you make soap without lye? No, not with cold saponification: lye is the essential chemical agent for the reaction. Without it, you get a mixture of oils, not soap. Only the “melt and pour” base (pre-saponified soap to melt) allows avoiding lye handling.
What is the best homemade soap recipe for beginners? The honey-oat soap remains the most accessible: few ingredients, comfortable superfat, and it forgives small temperature inaccuracies better than more technical recipes.
Is homemade soap as effective as commercial soap? Yes, often gentler due to the superfat, but it will generally lather less than industrial soap packed with synthetic surfactants.